|
Hey Jim! This is meant for you, but if you know of anyone else who would benefit, feel free to share.
I'm going to go through everything from how I install the programs to how I use them. Nothing is written in stone here, but it might give you a few ideas and save you some grief.
As I said, it's a starting point.
Also, all the programs I've listed here are free to use. That's one good thing about lunar and solar imaging; you don't have to have much to get decent results.
I use a Canon T3 12.2MP DSLR that cost me $340CDN in 2015. My scope is a 1997 Celestron C80-HD f/11.4 on a CG-4 that I bought locally for $160CDN.
With the tax on the camera, that's a total of just under $550CDN. I also spent the $50CDN for a sheet of Baader solar film, made a filter for this scope and one of my 60mm's, and still have a little more than half a sheet left. I'll get into that at the end of this page.
|
|
Programs and Installation
These are the programs I use, in the order of usage: PIPP, AutoStakkert, and either ImPPG or Registax.

| |
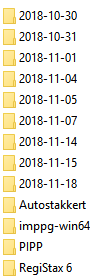
For installation, I find it easier to install the programs in my Pictures directory. This way, the pictures I want are just one directory level up.
To the right is a partial screenshot of my Pictures directory in Windows 10.
I believe the default installation directory for all of them is under Program Files.
Nothing wrong with that, I just prefer the Pictures directory as that's where I download the pictures from the camera to, so it's all right there.
|

|
PIPP
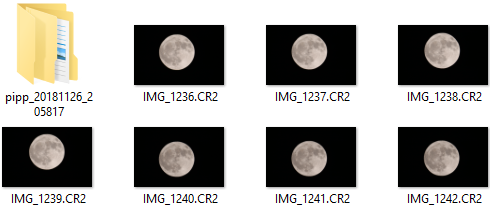
You've taken some shots of ol' Hateful, and unloaded them from your camera onto your computer.
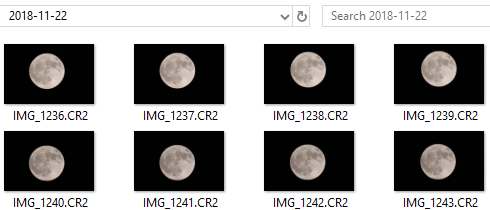
You now have a directory with pictures like these:
I'll be using some picture I took of the full Moon on November 22, 2018 for my examples.
|
|

|
You'll notice that none of the images are centered or lined up with one another. Also, the pictures themselves are a fair size.
What PIPP will do is crop the images, and save them in a TIFF format. There are a lot of options in this program, and most of them I haven't played with.
Feel free to do so; I'm just going with what I know.
Open up PIPP. At the top left, click on File, then Add Source Files. Once the window comes up with your computer files, go to the directory where your images are.
Click on the first one, scroll to the bottom, hold the Shift key and click again to highlight them all. Or you can just click on any file and then press Ctrl-A.
Once you have them highlighted, click Open at the bottom. Give it a few seconds.
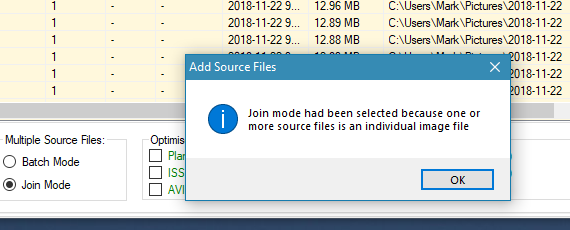
A window will then come up saying, "Join mode had been selected because one or more source files is an individual image file".
I think it should read "has been selected..." but "dammit, Jim, I'm not an English teacher!!" lol...
Anyways, just click OK. An example is below:

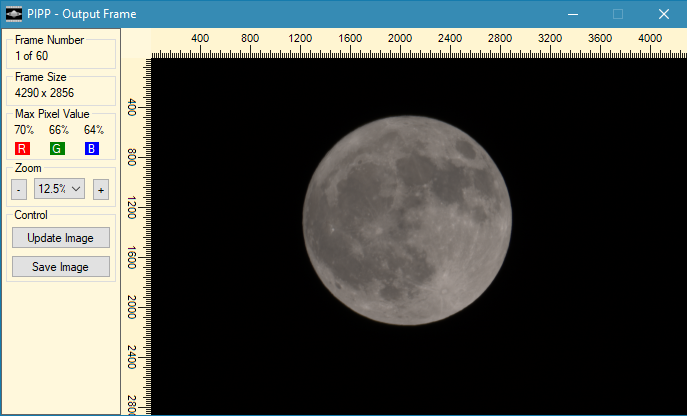
Once you've done that, another window will come up called PIPP - Output Frame. In it will be one of your frames.
You can just click on the X in the upper right corner to get rid of it; for what we're doing, it's more of a preview window.
Again, here is an example below:

Alright, so now you're back at the PIPP main screen; all your files are there, highlighted in a pastel yellow.
At the bottom, you will see Optimise Options For, with seven green options. Click on the box next to Solar/Lunar Full Disc.
Even if your shots are only of a sliver of a Moon, select this option.
Now there should be a check in that box, and a filled circle for Join Mode, as shown below:

And let the processing begin... Well, a few more things first. On the PIPP window at the top, there are seven tabs. Source Files, five tabs for Options, and Do Processing.

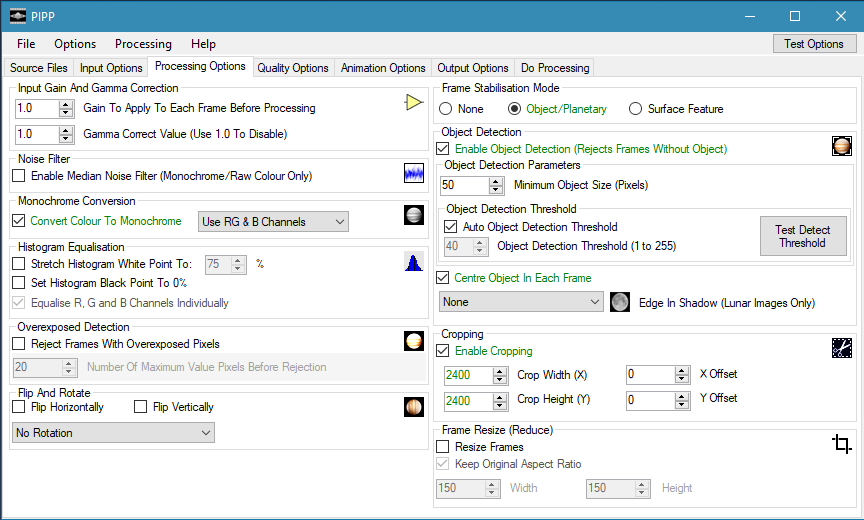
Under Processing Options, I usually leave the Monochrome Conversion - Convert Colour To Monochrome box checked.
The only time I un-check that is if I have images that I want to have some colour in, obviously :) However, that (for me) only works best on a first-quarter or under Moon.
Also, the final image has to be processed in Registax, not ImPPG, as ImPPG converts it back to monochrome.
For detail, I've found that converting colour to monochrome works best.
Also, on the right, you'll see Cropping - Enable Cropping. The images come off my camera at a size of 4272 X 2848.
I always set the cropping to 2400 X 2400. You can do whatever you like, that's again just me.

You can test how it will look beforehand by clicking the Test Options box at the top right. This will again bring up the PIPP - Output Frame window,
with one of your images in a frame that matches the crop size you've selected.
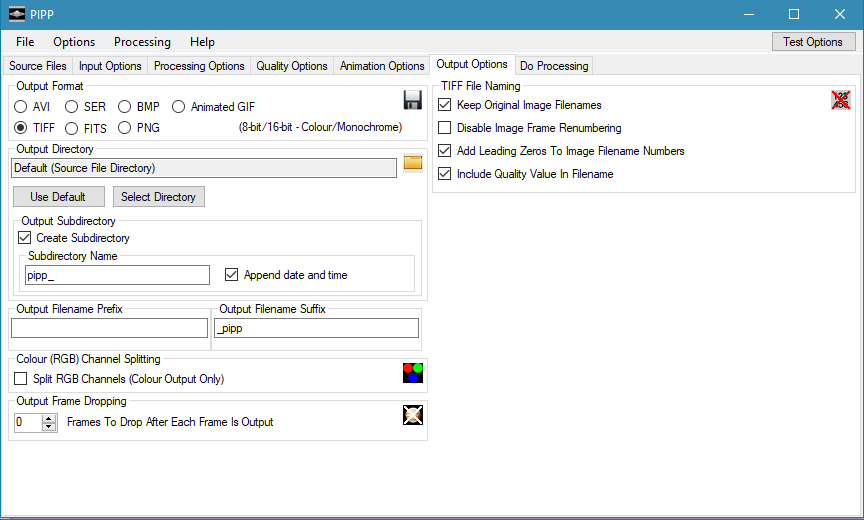
Next, click on the Output Options tab. Here, I just make sure the Output Format up at the top is set to TIFF; sometimes it defaults to AVI and I'm not wanting a movie :)
Otherwise, I just leave everything at the default.

Here in this window, you can also change the Output Directory to whatever you like. Again, I just leave it at the default. It will show up under the directory your
pictures are in.
So now it's all ready to process. You can click the Test Options button again if you want to make sure. Once you're satisfied with everything, click on the tab next to it, Do Processing.
When you do so, you might see a green bar scrolling across on the left side of the window. No worries; it'll stop when it processes 1 of however many frames you have.

All you have to do now is click the button up on the top left that says Start Processing.
The time it takes depends on your computer's power and how many files you have to process.
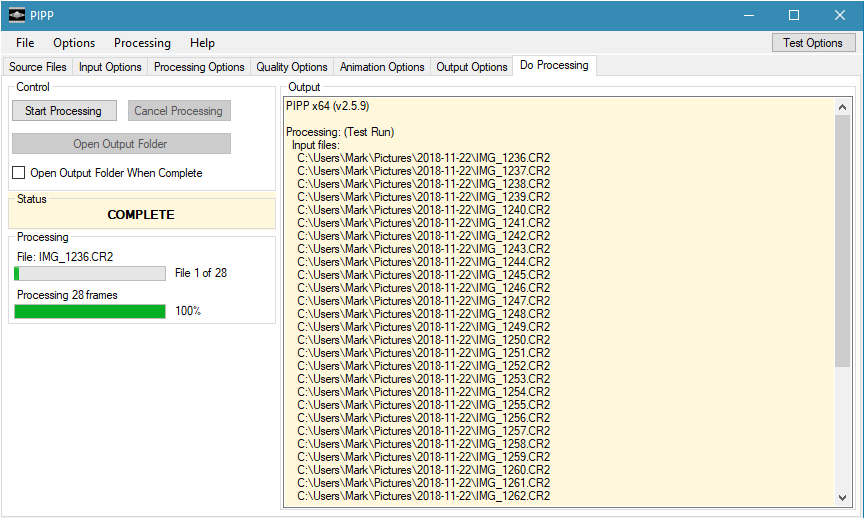
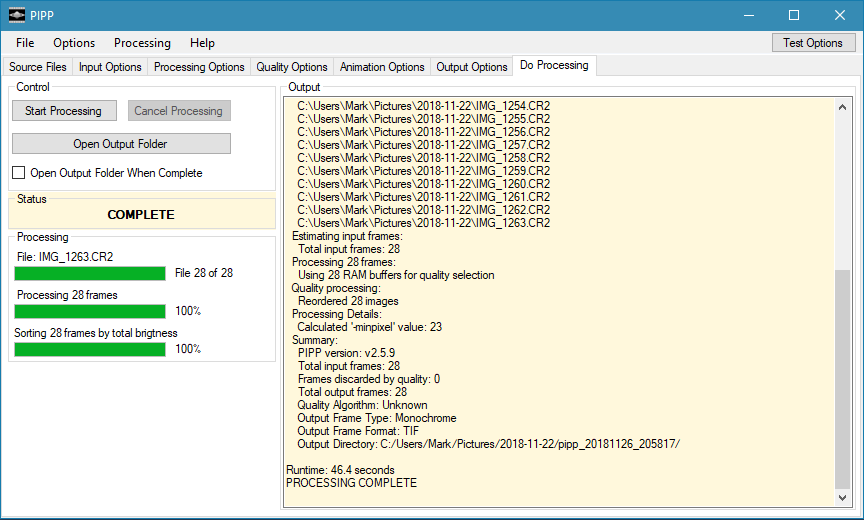
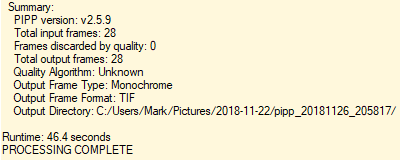
Once it is done, the PIPP window will look like the window below. You'll notice on the right side it gives some information; under Output Frame Type, you can see I used the monochrome setting.
There is also the output directory listed, as well as the time it took.

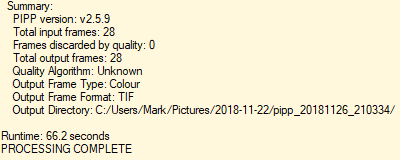
Below I put two screenshots, the first show the result of monochrome output, and the second shows the colour output result.
It also took an extra 20 seconds for the colour...
 
You can also save your processing settings, once you get them the way you like. Just go to Options at the top, and select Save Options.
It will save it as a .POF file in the PIPP installation directory.
I've also included a link below to my options files; all two of them.
I had to put them in a ZIP file; the POF extension is not a recognized MIME type...
One is for Monochrome and one is for Colour settings; they both crop to 2400 X 2400 and save in TIFF format, and are good for both the Moon and Sun.
Use them if you want :)
PIPP Settings for Monochrome and Colour
To use these settings or your own that you've saved, go to Options, and then Load Options.
I know. Thank you, Captain Obvious...lol!!
Now when you go to the directory with your picture files, you'll see the addition of a folder.

The folder name, by default, is PIPP_date_time, as you've probably already figured out. Inside that folder, you will have two folders:
A log folder, and a folder named IMG_your first image number. Mine is named IMG_1236, as IMG_1236.CR2 was the first file in my processing list.
Inside that folder is all your RAW files converted to TIFF format, all of them centered and the same width and height. They will also have a "quality percentage" associated with them.
An example filename will be 03_IMG_1237_quality_99.82%.tif.
The quality is based on the settings under the Quality Options tab in PIPP; which I leave to the default of Total Brightness Algorithm.
And these are all the files (or most of them) that you'll use for the next step, AutoStakkert.
And that's that for PIPP!
|
AutoStakkert
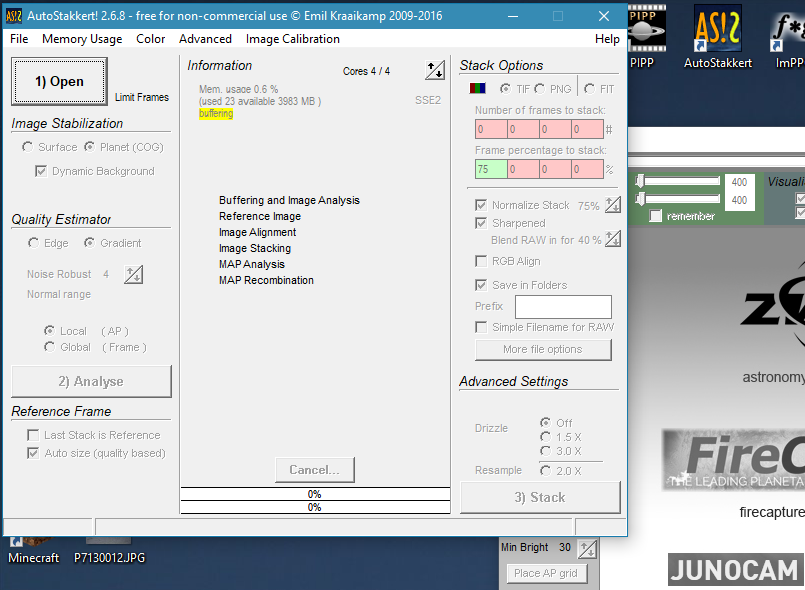
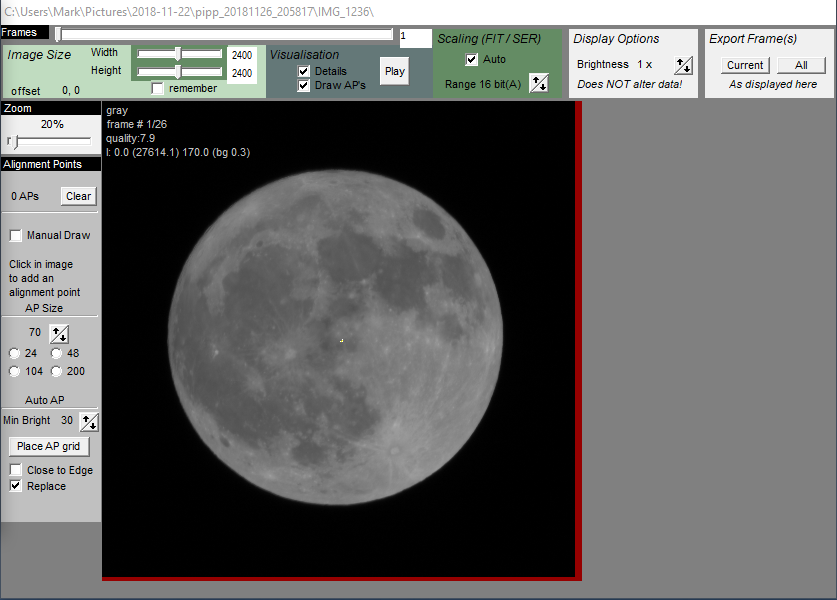
On to AutoStakkert. When you open the program, you'll get the main window and a preview window in back of it, part of which is pictured here.

Now you want to click the button that says 1) Open. I know I would too :). Remember the directory PIPP created with all the Tif files? That's what you want
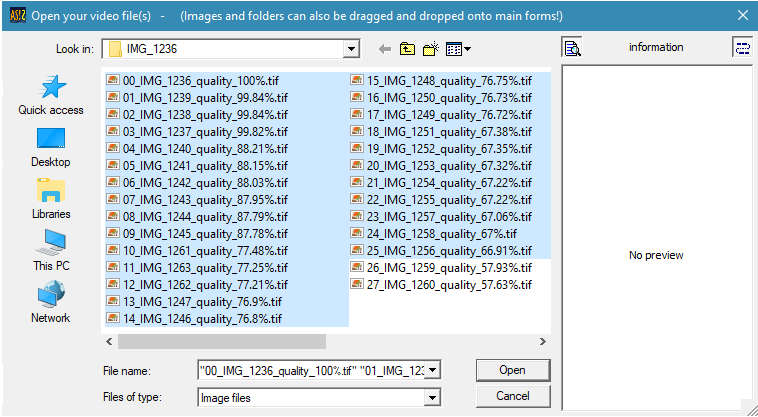
to open. When you do, you'll see "No items match your search". Dowm at the bottom next to Files of type, it says All Supported Video Formats.
That's the default and all very nice, but we want Image files.
Change to that, and you'll see all your files now. I've included a screenshot with my files in List view.

Now this is where a lot of people would perhaps disagree with me, but here goes. When I select the files, I only take the ones that are above 60% in quality.
I could (and have) selected ones below 60%, but more often than not, it takes away from the final image quality. Either it's too dark or out of focus. I've selected just 80%
and above quality, but the final stack is usually a little on the bright side. That could be due to my telescope and camera combo, and even just personal taste.
Again, whatever works for you. You'll notice in my file listing screenshot above, I have two that are just below 60%. I'll leave them out for the next steps.
OK, so now you've highlighted the files you want, and have clicked on Open at the bottom of the window. Once you've done that, the preview window that was in the back
is now in front, probably at 100%, too. To make it manageable, you might want to resize it to 40% or so, depending on your screen size. You'll notice the slider to do that
just to the left of your image up top; it says Zoom right above it.


|
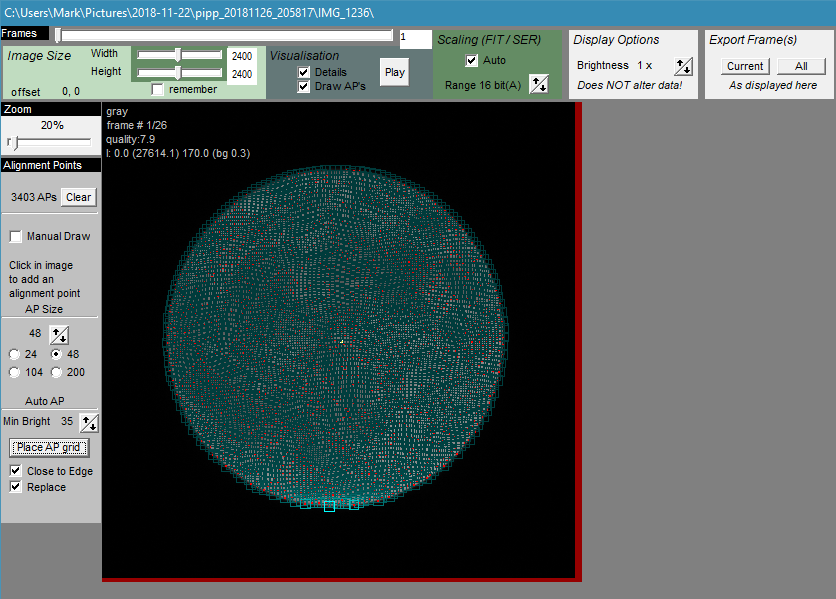
To the left are the menu items in the preview window; these are the default settings after installing AutoStakkert.
To the right is the same menu, after a few settings have been changed and the Place AP grid button was clicked.
Under Alignment Points, there's a few options. You'll see it says 0 APs with a Clear button, and below that is Manual Draw.
Manual Draw, when checked off, allows you to make your own alignment points, which is handy for small images of planets. Not so with ol' Luna.
Below Manual Draw and the "Click in image blah, blah" it says AP Size.
Again, this is open for debate, but the setting I most often use, from below a quarter of a Moon
to a full disc, is 48. For a full Moon, 104 will work, but I find the stacked image to be sharper at 48. With 24 on a full Moon, I've noticed that the stack will sometimes
have crater edges that are 'doubled'; it can look like a washboard. However, 24 is good when you have a thin sliver. And I've yet to use 200.
Below that is Auto AP. The Min Bright setting is default at 30, this or 35 I find is perfect. Finally, there is the Place AP grid button. But before you click that, check off
the box below it that says Close to Edge. Now it's good to go, so have at it and click that Place AP grid button!
|

|
Once you've clicked that, your preview window will very soon look like this:

All those green squares with the red dots are the alignment points. These are what's used for lining up the images in the stack.
Alrighty then, back to the AutoStakkert main menu window. Under the 1) Open button on the left side, you'll see the headings Image Stabilization and Quality Estimator. Then below that is another button, 2) Analyze, and lastly, the heading Reference Frame.
I have yet to change any of these settings for Lunar images; I believe they're only for video (AVI/SER). The Noise Robust setting I've played with; the default of 4 seems good. And the Reference Frame is of no point to me, I really don't care, lol...
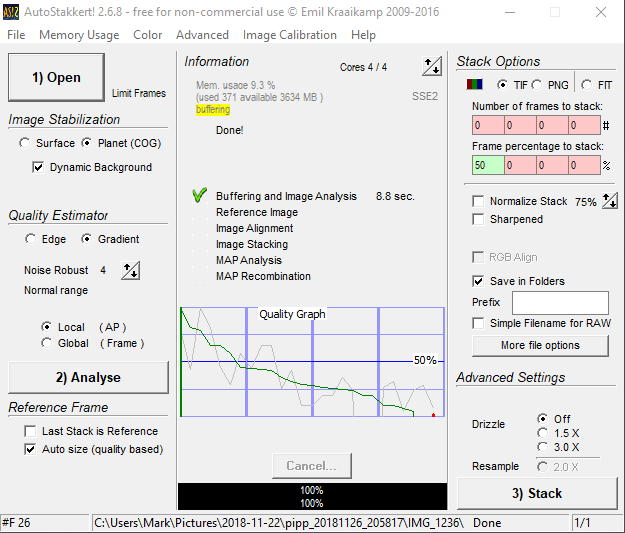
OK, now click on the 2) Analyze button. Your PC will go at it for a few seconds, and then your window will look somewhat like this:

So that's all good. In the middle of the window, you will see some information about your PC at the top, and towards the bottom the Quality Graph. You'll note that my example quickly degrades into crap, or so it would seem. I don't pay too much attention to what it shows, to be quite honest.
Now that your images have been analyzed, it's time to stack them. Almost...
Before that, some changes should be made to the Stack Options on the right side of the window.

|
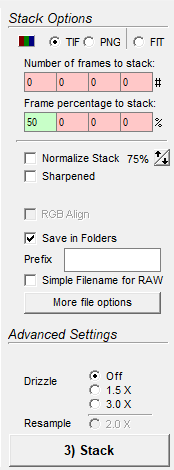
To the left are the Stack Options in the main window; again, these are the default settings after installing AutoStakkert.
At the top are the formats you can save the output image in; I recommend leaving it at TIF.
Below that is Number of frames to stack: and Frame percentage to stack:. I almost always set Frame percentage to stack to 100. Since I've already told AutoStakkert what images I want to stack, doing 100% of them seems like the way to go. You can also set the first box to 100%, the second to 75%, etc. Or whatever percentage you'd like :D
Next is Normalize Stack. I would advise clicking the box and leaving it between 70% - 80%. Any higher than 80%, and the Moon starts to get washed out. If Normalize Stack isn't checked, the resulting output is pretty dark. Personally, I leave it at 75%; hasn't failed me yet!
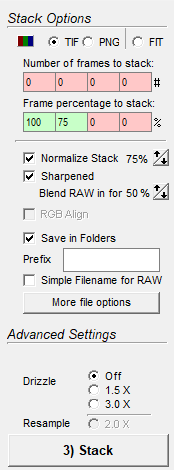
Then there is the Sharpened box, which you really want to check off. This will also result in two output files, one sharpened and the other not. More on that later.
When that box is checked, just below will pop up the option to Blend RAW in for 50%. This can be changed to whatever you want, I usually just leave it alone at 50%. I've played with it and don't see any difference, though that might not be the same for you.
The Save in Folders option you can leave checked; if not, the output files will be saved in the root of your IMG_number directory. Prefix means just that; put in, let's say 01, and your output filename will start with 01_. On the Simple Filename for RAW, I don't bother with it. The More file options button gives you the option to send your stack to another program; it also says it's Experimental...
And finally, the Advanced Settings I just leave alone; never had a need yet for Drizzle and Resample....
|

|
Once again, on the left are the Stack Options in the main window, but with the settings I use.
You'll notice I've set Frame percentage to stack: to both 100% and 75%. This is just an example to show you that you can have both (or even all four)filled in; again, I usually just go with 100%.
When you're happy with it all, you can click on the 3) Stack button!!
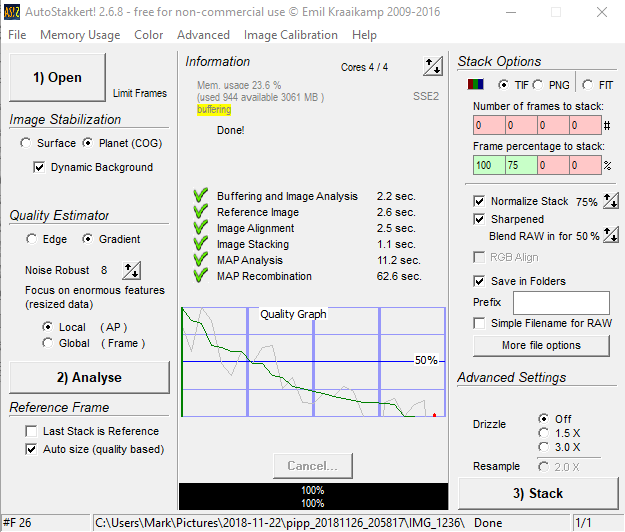
 Below is what my window looks like when it's done stacking. Below is what my window looks like when it's done stacking.

|
And that, my friend, is it for AutoStakkert! You now have two images saved, one sharpened and one not.
As for where they are and what the heck to do with them, that's all in the next section...
|
RegiStax
ImPPG
|
